Editor
Taking notes in Sapeum, whether for meetings, interviews, or reports, is just like taking notes in Google Docs or Microsoft Word, but even simpler.
There's also an ability to tag and structure your notes and documents in powerful ways that you can't in Google Docs and Microsoft Word.
If you import documents from another source (like Google Docs), you can use the editor to highlight and tag your existing documents, emails, CX tickets, and more.
Let's find out more.
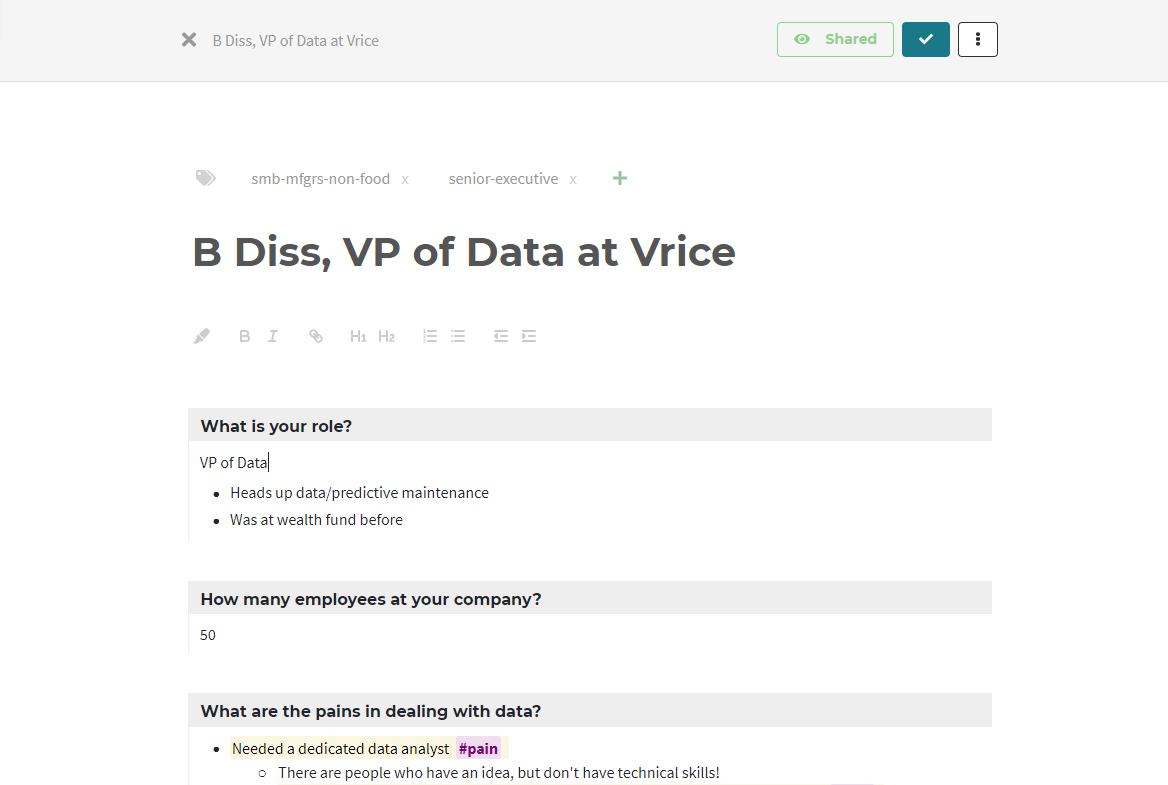
Tags, highlights, formats
There are several formats you can use in your document. Most of them require keyboard shortcuts (and many of these keyboard shortcuts should be familiar to you).
| Format | Description | Example | How to do it |
|---|---|---|---|
| Bullet points | Create bullet points. | 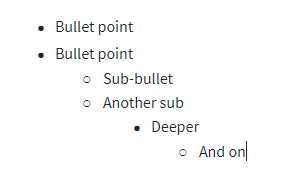 | Type - at the start of a line, or Command + - |
| Bold | Make text bold |  | Command + B |
| Italics | Make text italic |  | Command + I |
| Highlighting | Highlight a sentence to find/use it easily later. |  | Command + M |
| Sentence tag | Tag a sentence with a #hashtag to find/use it easily later. More here. |  | Type # and a tag name (or define your own shortcut) |
| Mention | Tag a sentence with a @person to find/use it easily later. More here. |  | Type @ and a name or email |
| Header | Turn a line into a heading, for aesthetic purposes. |  | Command + K |
| Section | Turn a line into a section heading. Section headings powerful can be used for analysis. More info here | 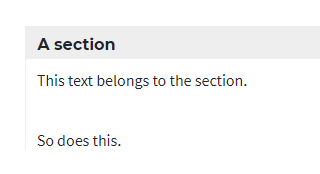 | Command + J |
Highlighting sentences
If you hit the shortcut for highlighting (Command + M), you will highlight the sentence that your cursor is in. If you've selected multiple sentences, then all of those sentences will be highlighted.
Tagging sentences
You can add sentence tags inside the document body by typing # followed by some letters, numbers or hyphens (no spaces allowed in a tag). In fact, as soon as you hit #, you'll pop up the sentence tag menu, from which you can select past or important tags.
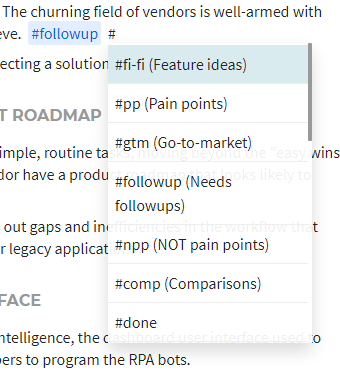
Sentence tags apply to the sentence they're in (or the sentence they immediately follow):

Sentence tags can also be easily applied using keyboard shortcuts. See here for how to define keyboard shortcuts for your most important tags.
The sentence tag will be applied to the end of the sentence you are currently in. If you have multiple sentences selected, they will all be tagged.
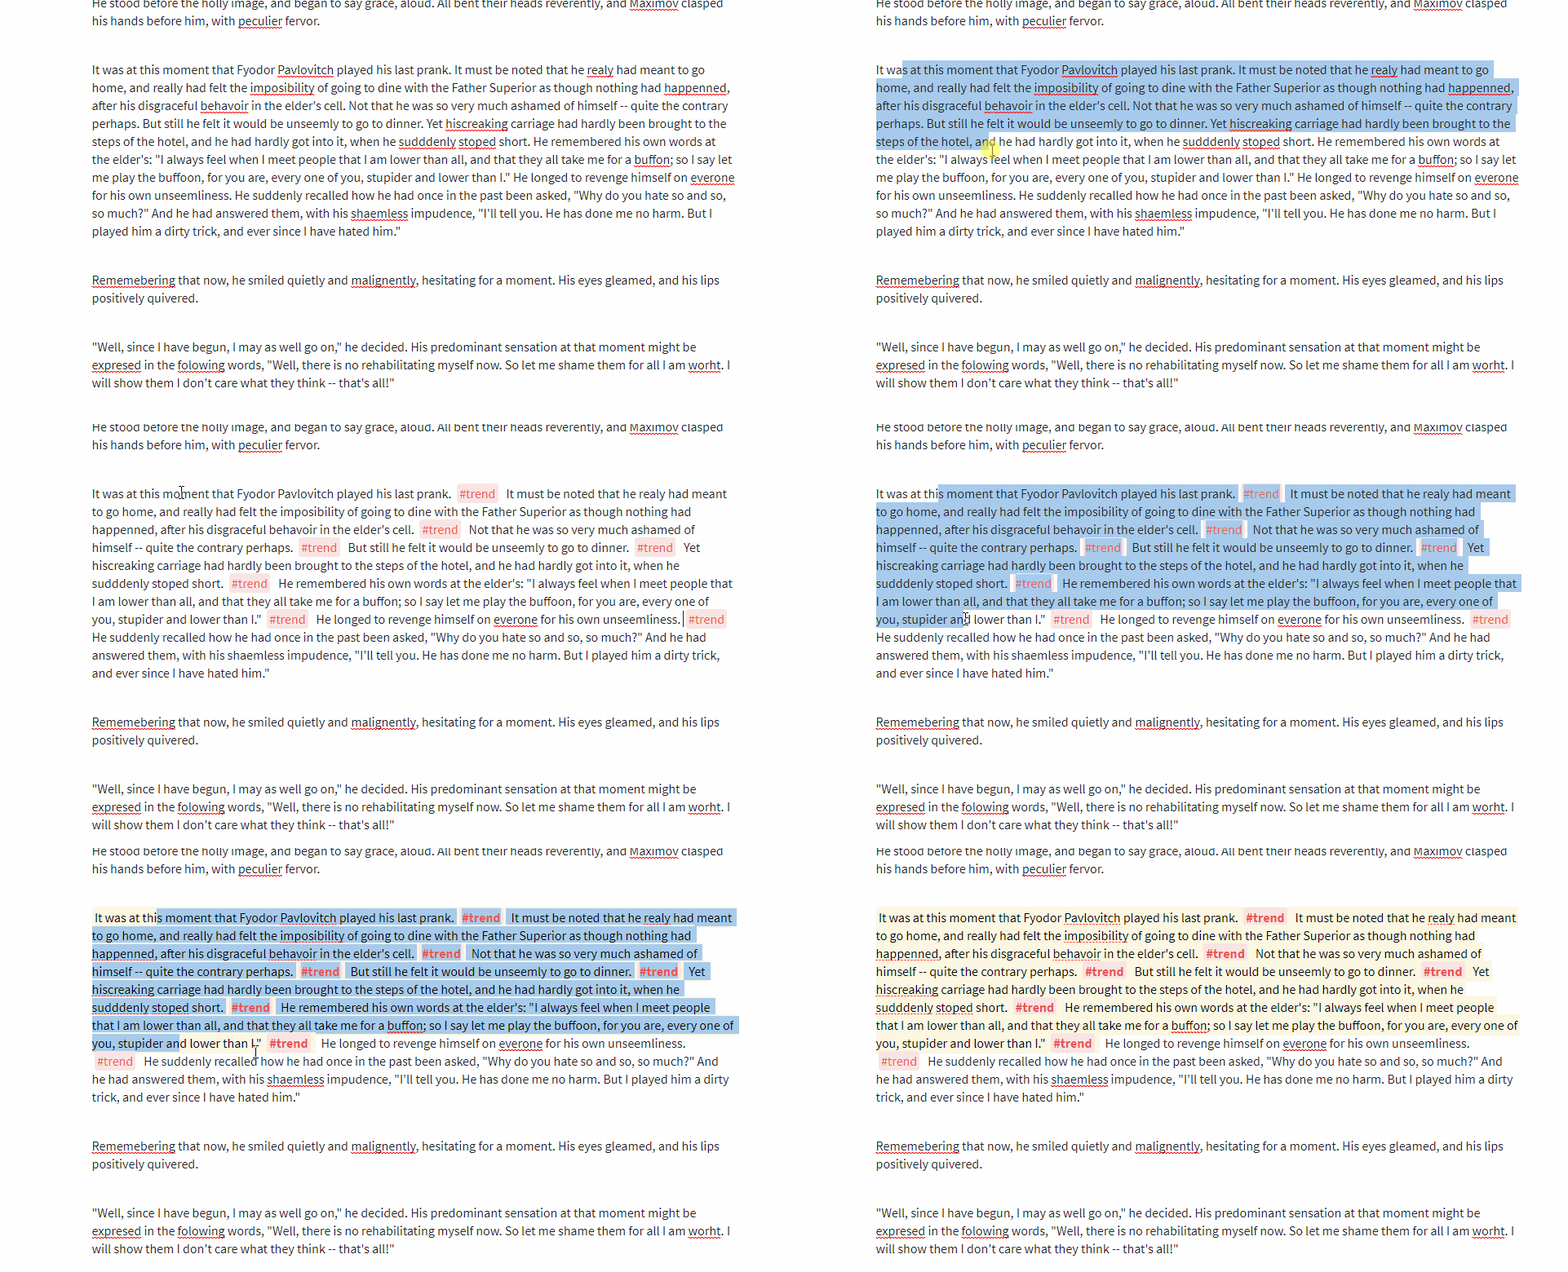
You can remove that same sentence tag just by repeating the same keyboard shortcut.
You can define a certain set of tags to be "key tags" - learn more here.
Later, in the Digests view, you can filter and analyze by these sentence tags.
Mentioning
Similarly to sentence shortcuts, type @ to bring up the mention menu, which contains the list of your teammates.
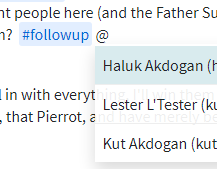
Later, in the Digests view, you can filter and analyze by these mentions.
Document tags
At the top of the document in the editor, you can add or remove document tags. This is a tag that applies to the whole document. Later, in the Digests view, you can filter and analyze by these document tags.
(These are different to sentence tags, above, which are inline tags you write into the document body, and only apply to the sentence they're in.)
Just like sentence tags, document tags can only contain letters, numbers, and hyphens.

Saving and exiting
You can leave by saving a draft (which does not publish your document, nor run analysis, nor make available for filtering, nor make available for your team).
You can hit Escape or click the up arrow in the top right of the document to leave and save as a draft.

If you're ready to publish, click the checkmark in the top-right to save, publish and exit. (Command + Enter will have the same result.)

Your documents auto-save every few seconds, but if you really need, you can still save by hitting Command + S.
Digest sidebar
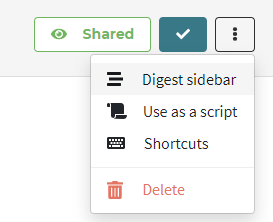
Document digests (enabled by clicking the Digest sidebar button at the top of a document, or hitting Command + D) will create a summarized version of your current document in a new sidebar on the right-hand side.
The summary will be show every sentence that is tagged or highlighted, grouped by its tag.
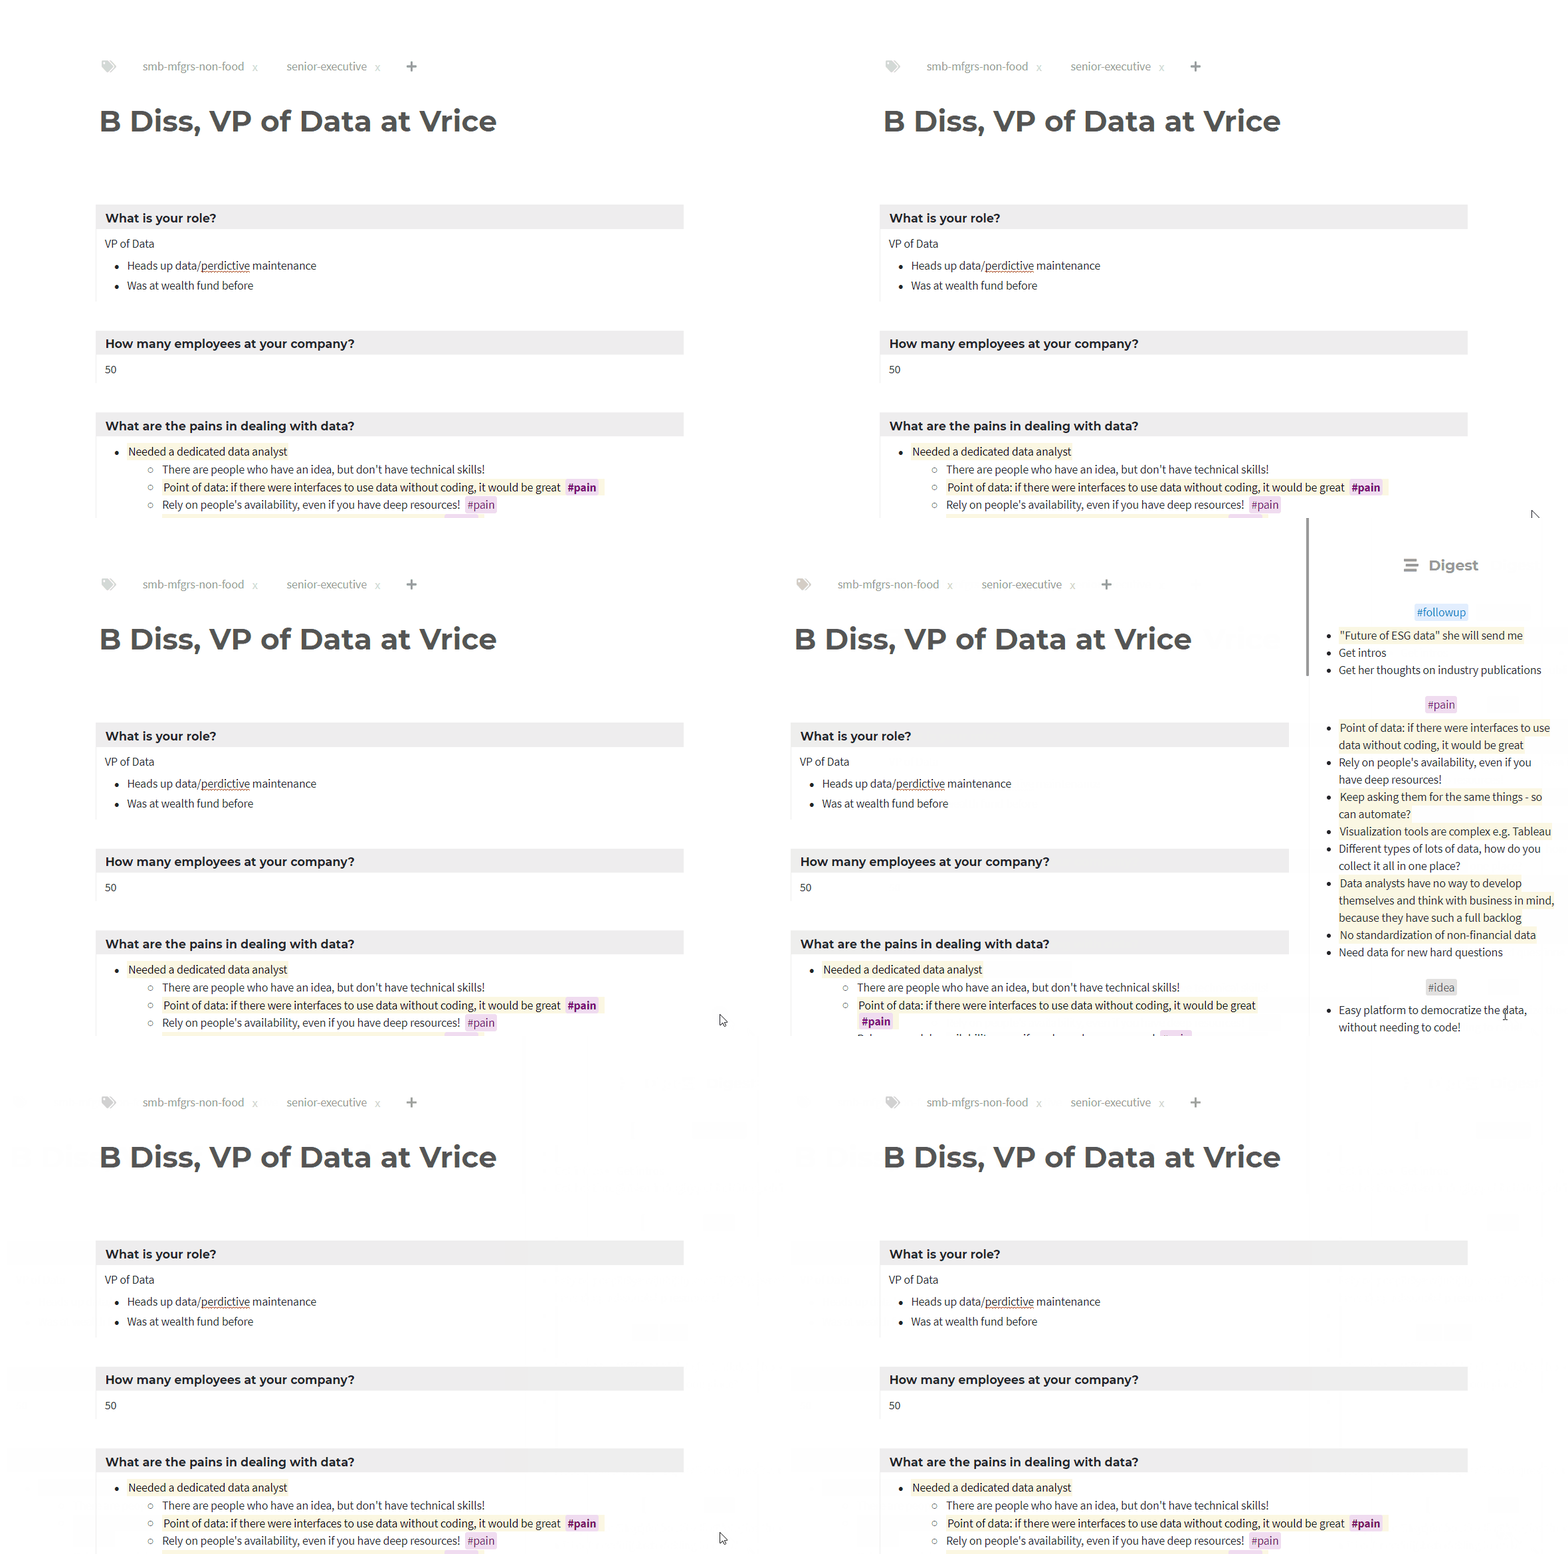
This can be helpful when:
- You want to quickly review how a meeting or interview went, right after
- You want to write an executive summary at the top of the document
- You want to give team members an overview of the document in the future, without doing any extra work
Try copy-pasting your document's Digest into an email or Slack to give team members a quick update on how a meeting went, or what the #followups are.
Privacy and security
Visibility
Documents are created as private by default. If you would like to share the document with your team, click the Share button at the top of the document.


You can see in the Docs & notes view.
Permissions
If you have read-only permissions, you will not be able to make any edits.
Templates
Every document can be treated as a template, or a "script", both to save time copying during interviews, and to summarize answers later by interview question. Learn more here.